
Start Learning Citrix NetScaler - Part 2- Introduction
Hi All
Before we start talking about NetScaler but there is one question comes in mind why NetScaler ? why not F5 or other devices.
Why NetScaler:-
1. more than 10 million websites uses NetScaler at the moment and even Netscaler holds a strong position in cloud services.
2. biggest brand uses NetScaler in their environment like microsoft, Apple, mastercard, ebay and many more.
3. In cloud netscaler plays a major role in delivering web services and application.
4. Amazone AWS offer NetScaler instances to use with web applications.
Whats NetScaler:- In IT networking world , Netscaler device can do almost everything, work with IP routing technologies, works with OSPF, BGP and RIP technologies, perfect tool for load balancing services with the intelligence of backend server analysis, Acceleration by using Compression, TCP buffering, Traffic Shaping, SSL (encryption and decryption technologies) and unique product which support ICA Proxy stuff.
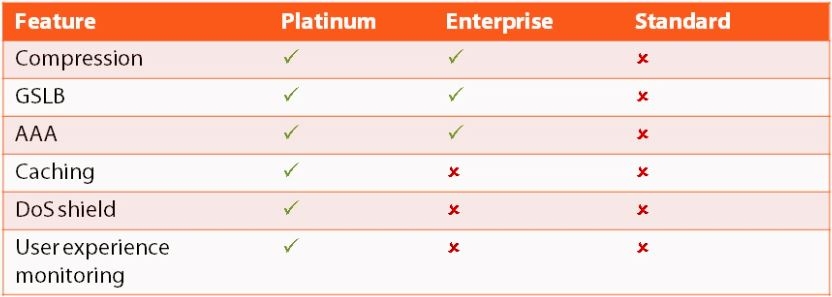
Type of Edition of NetScaler:- Platinum, Enterprise, and Standard
Each edition enables more features and speed for your environment but all the edition includes some features which are common.
a. Load balancing, SSL offload, High Availability and TCP optimization.
the small list of features with the edition.
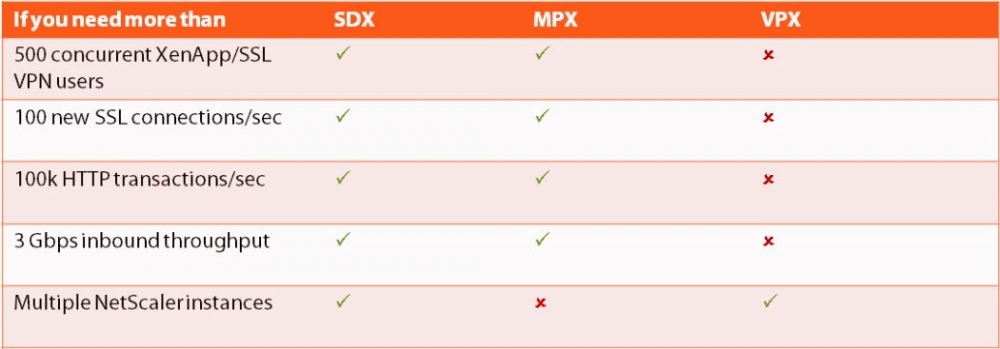
There are 2 kind of platform Netscaler provides.
1. Virtual - VPX appliance (can run on HyperV, Vmware ESXI XenServer & Linux KVM)
2. Physical - comes with MPX and SDX.
NetScaler VPX:- it cost less and easy to setup in HA or multiple instances but the only problem is the performance which depends on the H/W you are running it. any issue with underline Hypervisor layer will cause the problem for VPX performance.
NetScaler MPX:- its costly solution and comes with special H/W to support SSL traffic, limited to the single instance as it built in and would need another MPX model to configure the HA configuration. it offers better performance due to special H/W builts to handle Traffics.
NetScaler SDX:- It a cost-effective solution for organization those needed multiple Netscaler instances. it runs XenServer OS which allows running multiple Ns instances.
so the decision is based on what you need to support your environment so pick wisely :)
Thanks
Amit Gupta
CCA in XenApp / XenDesktop . XenServer, Google Cloud Architect, MCSE ITIL , Vmware Certified.
https://www.linkedin.com/in/amit-kumar-gupta-5321a527/